Sample mounting & cleaving
Sample plates at BLOCH
The endstation is configured for Omicron flag-sample plates, both the ‘flat’ and ‘direct-heating’ types:
We keep a large stock of copper and aluminium flat plates for experiments that do not involve heating above 100°C. These are treated as disposable - i.e. we don’t want them back after your experiment. You are also welcome to bring samples on your own carrier plates, provided that they are compatible with the endstation. The thickness of the plate (1.0mm) and the rounded corners of the tag are important. A CAD drawing of the flate plates we provide is available (here)
For preparations involving heating above 100°C, molydenum sample plates of both types are available at the beamline for general use. These plates are shared among all users; if your experiment is particularly sensitive to contamination then you may need to either clean the plate first or bring your own.
Mounting considerations
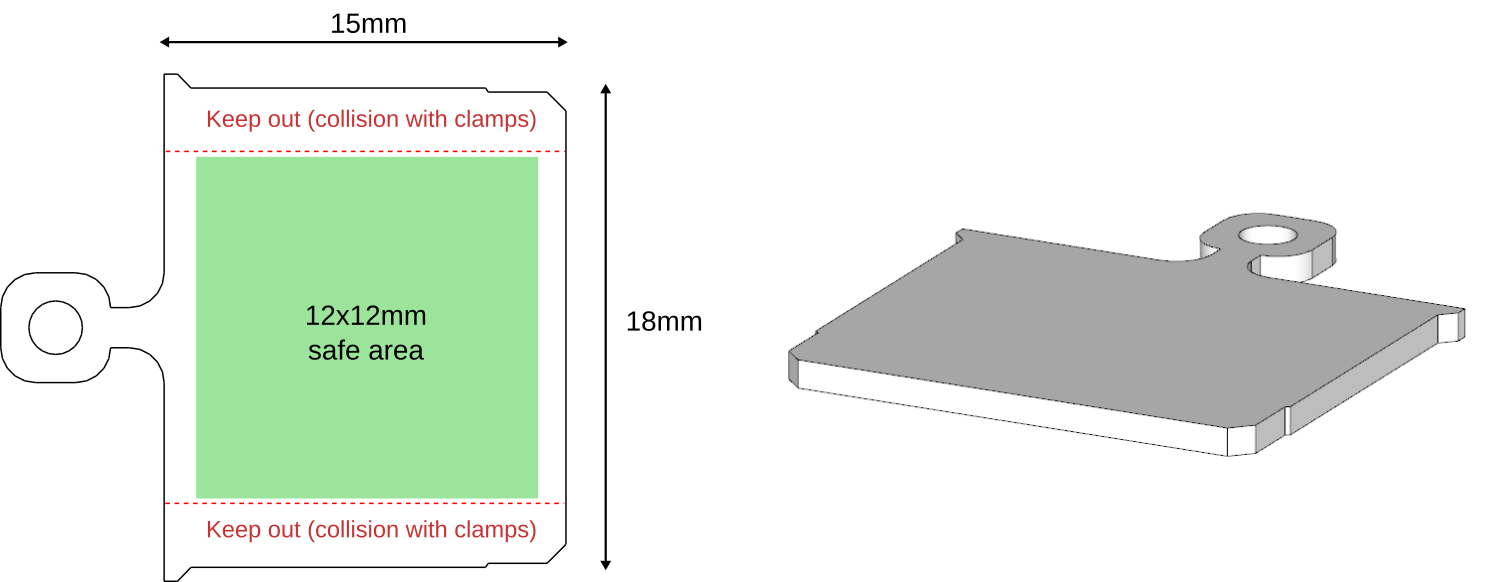
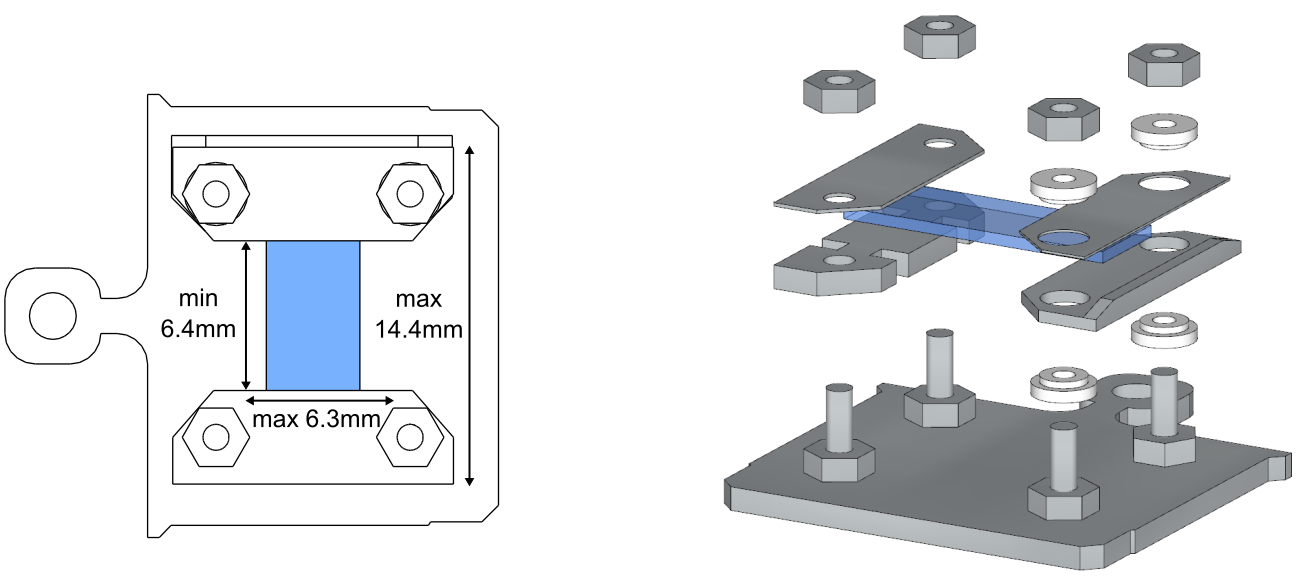
The Carving manipulator is configured to put the center of rotation 2.5mm above the surface of the sample plate (this corresponds to the surface of a 0.5mm thick sample mounted in a direct heating plate). For thin samples mounted on a flat plate, if you foresee a need for physical polar scans then consider using some kind of riser/shim to bring the surface closer to the 2.5mm target. If polar rotation will only be used for alignment, this is not necessary.
Sample heights of at least 20mm are OK for ARPES. Transfer into the STM chamber will become impossible for sample heights over 5.9mm (measured from the surface of the sample plate) due to a collision on the RDC head when you try to insert the plate upside down.
In the figure above a ‘keep out’ region is sketched, spanning approximately 3mm in from each side. If the plate thickness deviates significantly from the standard 1mm in these regions it may not be possible to insert it into the receiving station of the Carving manipulator.
If you are top-post-cleaving your samples and it is important that you keep the top half, attach the post to the sample plate with a thin wire. In this case ensure that the wire and post are conductive or covered in graphite spray.
Gluing
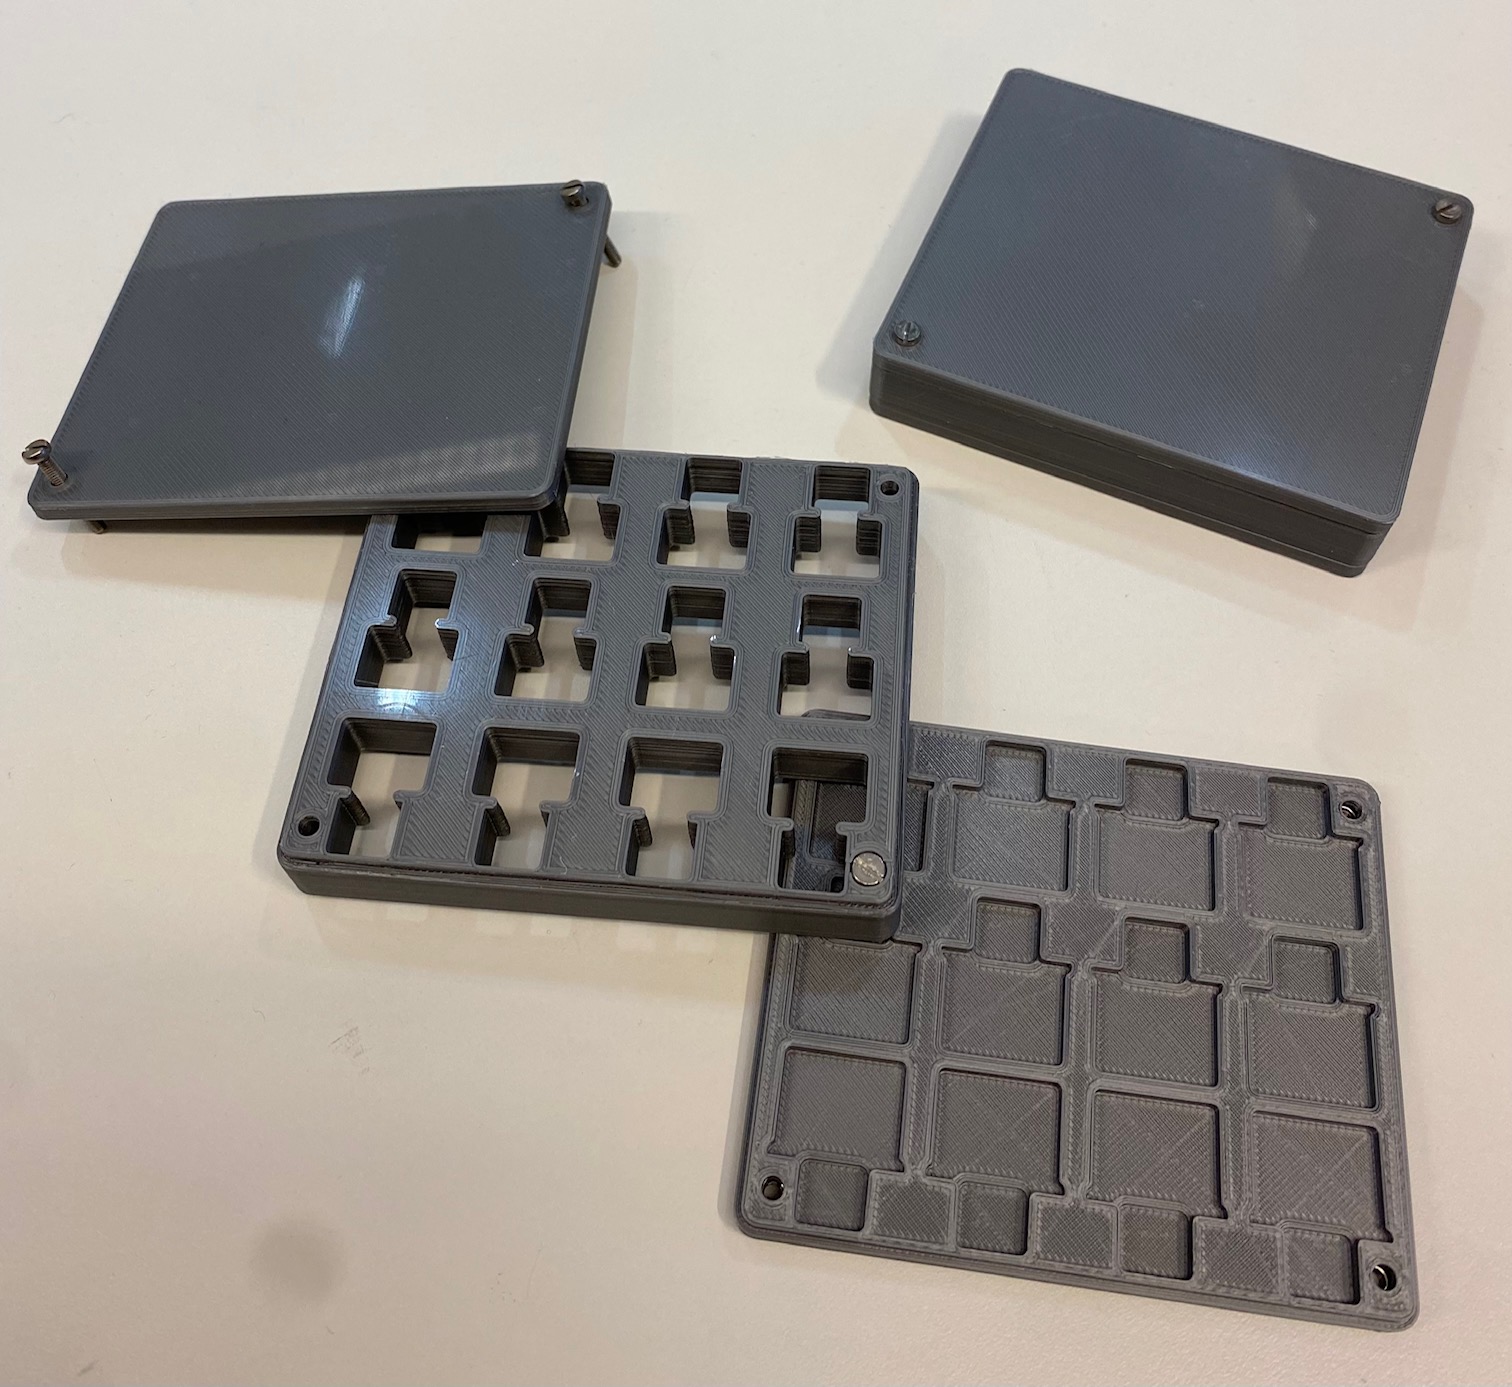
If you prefer to prepare your epoxy-glued samples ahead of time in your own lab, we can ship you a set of our plates in a 3D printed case that will keep the plates securely mounted and offer some protection in transit. Tell your local contact more than 2 weeks ahead of time if you would like to do this.
If you prefer to do the gluing here when you arrive, we can offer blank copper or aluminium sample plates, Epotek H21D conductive epoxy (pdf), Epotek E4110 conductive epoxy (pdf), Torr Seal (pdf) and graphite spray (pdf). We keep only a small collection of top-posts, so try to bring your own in case we don’t have what you need. Use of the epoxies must occur in one of the chemistry laboratories, where you will also find milligram weighing scales, hot plates, ultrasonic baths and an optical microscope.
The mixing ratio for H21D should be 10:1 by weight of Part A to Part B. A safe cure is 140°C; for 30 minutes, but lower temperatures are also possible if necessary (e.g. 80°C / 2hr). H21D will begin decomposing above 350°C. Samples that will need heating in UHV should not be mechanically mounted instead of glued. While the thermal expansion coefficient of cured H21D is about 10x larger than Mo and Ta, in practice we have never experienced problems with the epoxy coming off when cooling down to LHe temperatures. If needed, the best way to remove H21D is by reheating to the glass transition temperature (>120°C) on a hotplate. The epoxy softens and can then easily be scraped off with a razor blade.
If you are using graphite spray, you must either apply this through a mask (kapton tape is good for this) or clean off graphite from the tag and sample edges. We do not want material spreading beyond the plate. It’s a good idea to heat the sample plate above 100°C after applying the graphite in order to remove the thermoplastic binder.
Physical mounting
Tantalum foil/wire and a spot welder is available for mechanically mounting single crystal samples. The beamline staff have a lot of experience with mounting weird samples, talk to us if you want advice.
Tape cleaving
Tape cleaving is typically performed in the loadlock. Without baking, a pressure of 2 x 10⁻⁸ mBar is achievable. With baking you can get into the 10-9 or even 10-10 range. Tape cleaving in the preparation chambers might be permitted, but only after discussion with beamline staff.
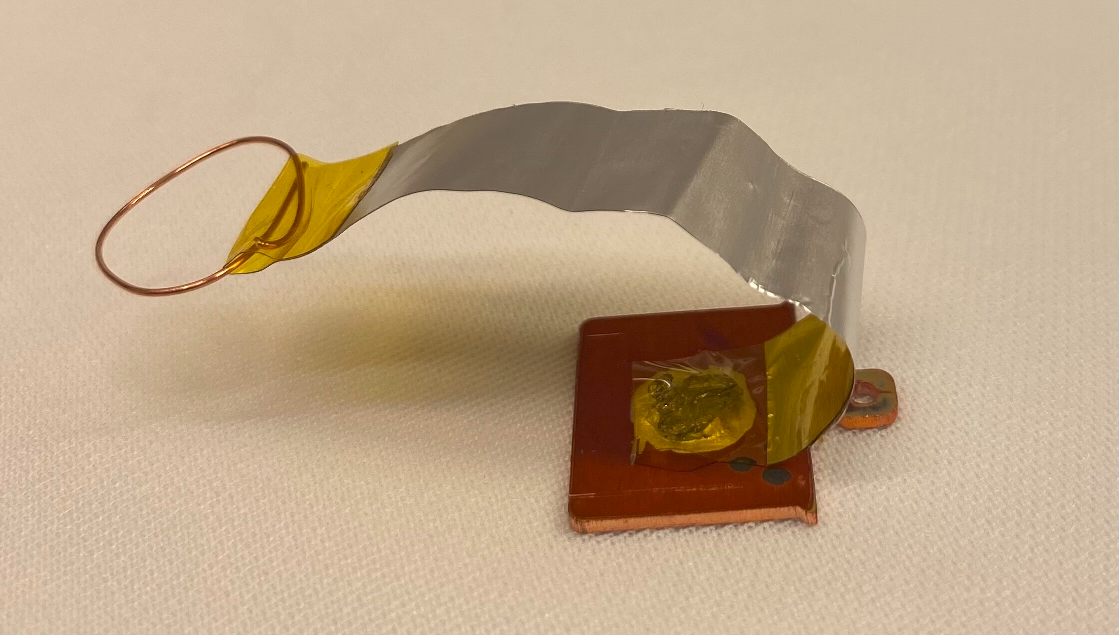
Our preferred method involves a mall section of kaption tape with a wire loop on the end. Take a short length (max. 4cm) of kapton tape. Attach a Cu wire loop to one end to make it grabbable by a pincer-style wobblestick. The other end should be trimmed down to just cover your sample. Cover the rest of the adhesive side of the tape with some Al-foil. This will both structurally reinforce it as well as prevent it from sticking places you don’t want it to.
When you want to cleave, grab the wire loop and pull. Make sure that you are reaching over the sample plate carousel to pull it, so that the cleaving motion pulls the plate into (and not out of) the carousel.
Leave the tape on top of the loadlock carousel so it can easily be retrieved during the next vent. If you drop it below the carousel, tell the beamline staff so that we know to remove the carousel later to retrieve it.
Top-post cleaving
Warning
Cleaving on the measurement manipulator is only permitted if minimal force is required. Excessive force will damage the wobblestick or the manipulator. If you expect that a lot of force will be required, either use an extra-long top post for higher torque, or cleave elsewhere in the system. Please discuss this with your local contact well in advance.
The analysis chamber on the B-station is well-equipped for cleaving, and there are no special considerations.
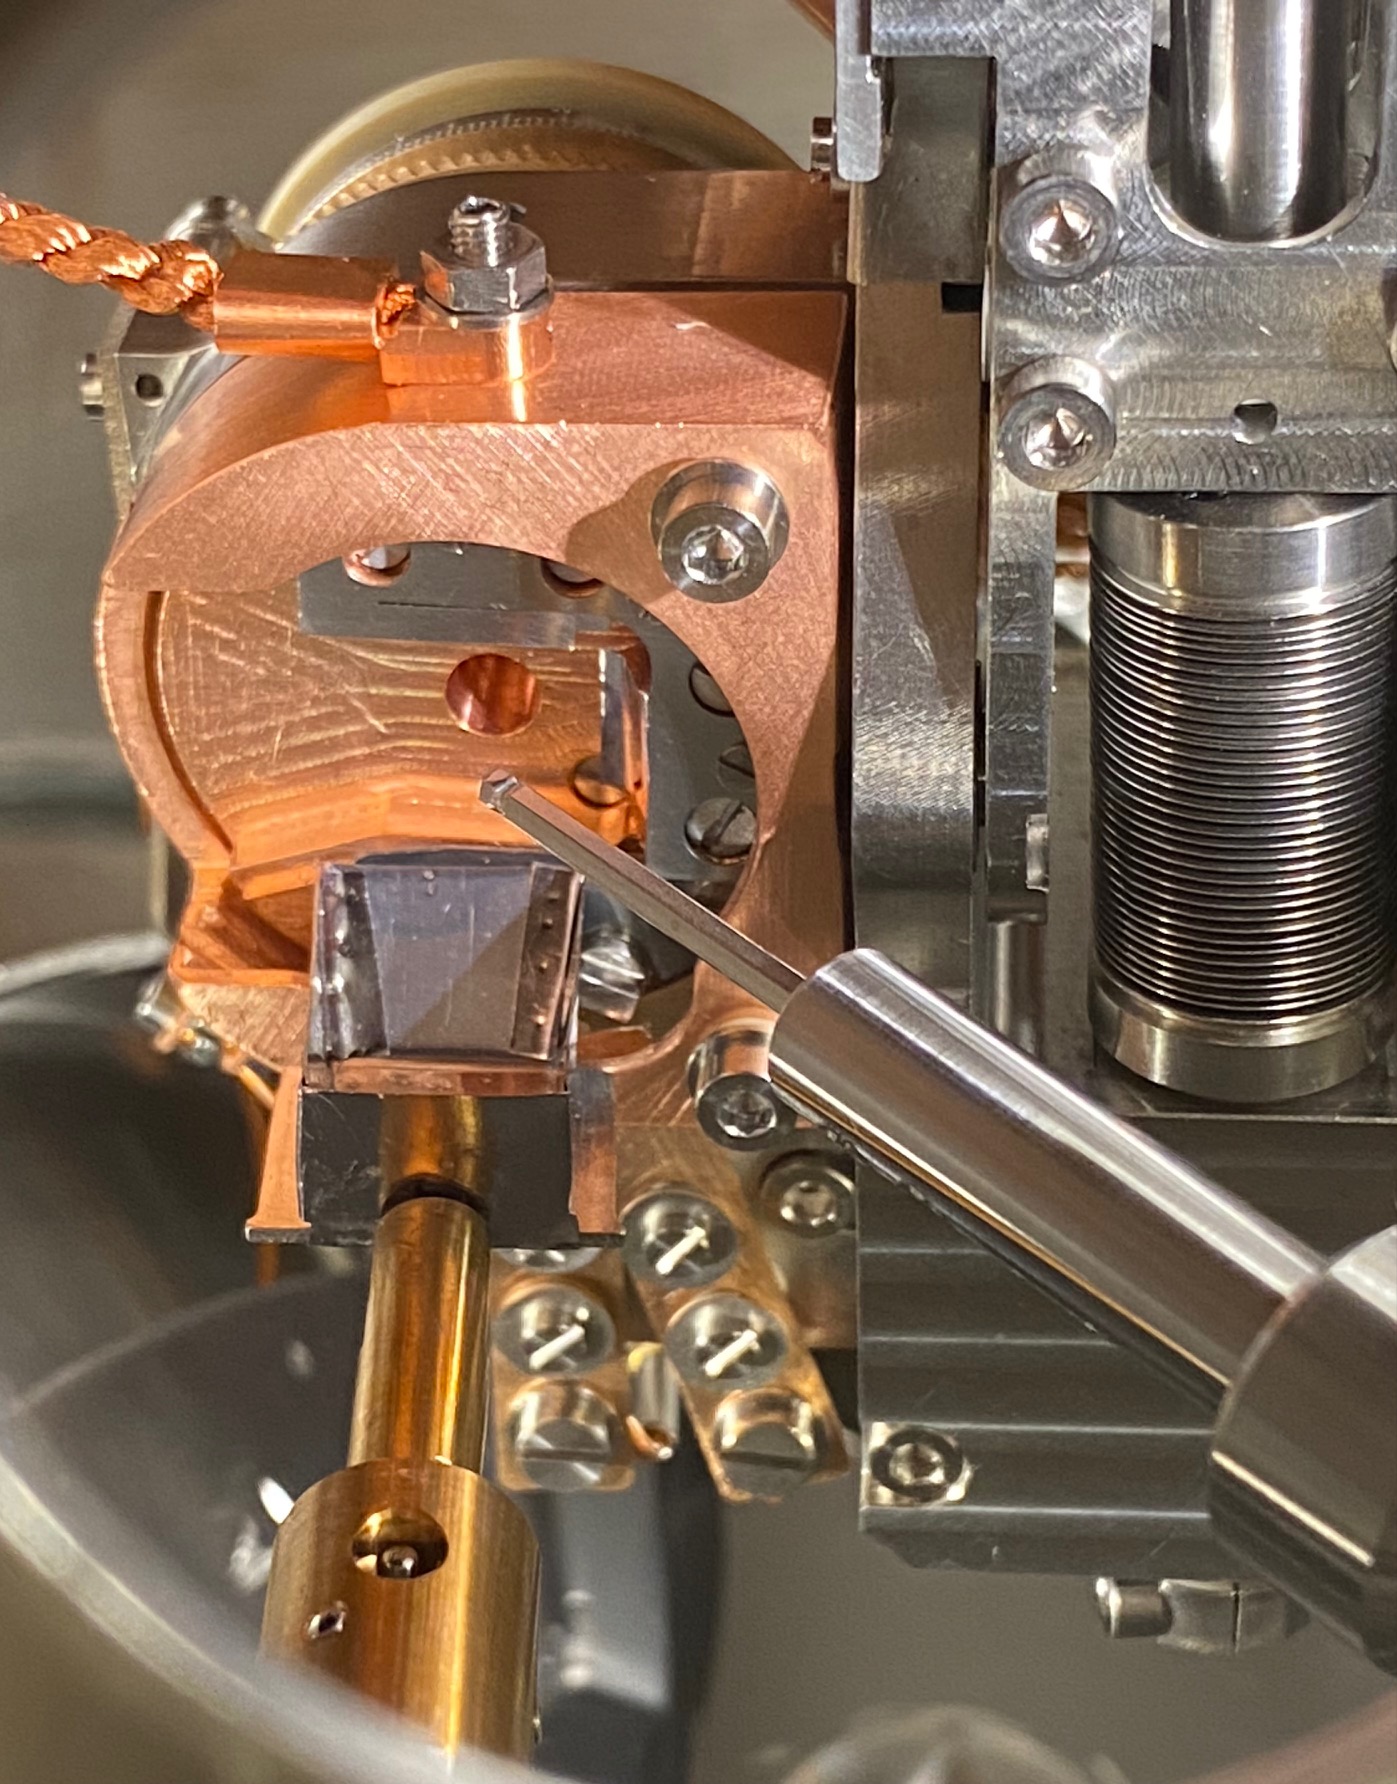
The analysis chamber on the A-station is not equipped with an ‘ashtray’ for catching debris from cleaving. For inert samples, mounted with standard Epotek H21-D epoxy and not requiring much force to cleave, you are permitted to cleave on the manipulator without needing to catch the top posts - just let them fall on the floor of the chamber.
In cases where the samples are dangerous, will contaminate the vacuum, have top posts attached with something other than Epotek H21-D (for example with torr-seal), you will be required to catch the top post in a transferrable basket sample. After installing the sample and tightening the clamping screws, pick up the transferrable basket sample plate, go back to the ‘tighten screws’ position and hold the basket beneath your sample plate. Press the leading edge up against the bottom of your sample plate such that there is no gap for the post to fall through. Then cleave with the second hex-head wobblestick. The situation will look like this (except there’s no sample in this photo):
Depending on the sample, you might need to adjust tilt or azimuth to make the cleaving and post-catching easier. If your top post is attached to the sample plate by a wire such that it won’t fall when you cleave, you do not need to use the basket.