‘Main’ Preparation Chamber
Typical pressure |
1e-10mBar |
Manipulator axes |
X,Y,Z,Polar |
Heating |
Direct current (>1200° C), e-beam (1000° C), e-beam (2000° C) |
Lowest sample temperature (LN2) |
<100K |
LEED? |
Yes |
Crystal growth monitor? |
Yes |
Sputtering? |
Yes |
Gas dosing? |
Yes |
Cleaving? |
Yes |
User supplied sources? |
Yes |
Vacuum suitcase docking? |
Yes |
Sample receivers
The PrepMain manipulator has two sample receivers. The one closest to the UFO chamber is for heating (direct current and electron-beam), while the other is for cooling.
The cooling stage has mechanical clamps for firmly securing the sample, while the heating stage uses only spring clamps. The source ports and instrumentation are configured such that you should never need to rotate the manipulator to a polar angle that might cause the sample to fall out of the heating stage.
The mechanical clamps on the cooling stage are tightened using a hex-head screwdriver, going into the underside of the sample stage. Consult with beamline staff if you need to operate it. The mechanism is clockwise to tighten, with a full range of motion of about 4.5 turns, but if the setpoint is correct then 2 full turns should be sufficient to fully tighten or loosen. Overtightening or overloosening will damage the mechanism. Those with sensitive fingertips will be able to feel the clamps bite when properly tightened, but it is subtle.
Moving the manipulator
There are two options for controlling the manipulator; review the information below and decide which one you prefer. The two different styles of control panel do not share information about saved positions.
Option 1: ‘New’
Double-click on ‘NewPSManip.sh’ on the desktop. This panel has a similar design to the Carving manipulator control panel.
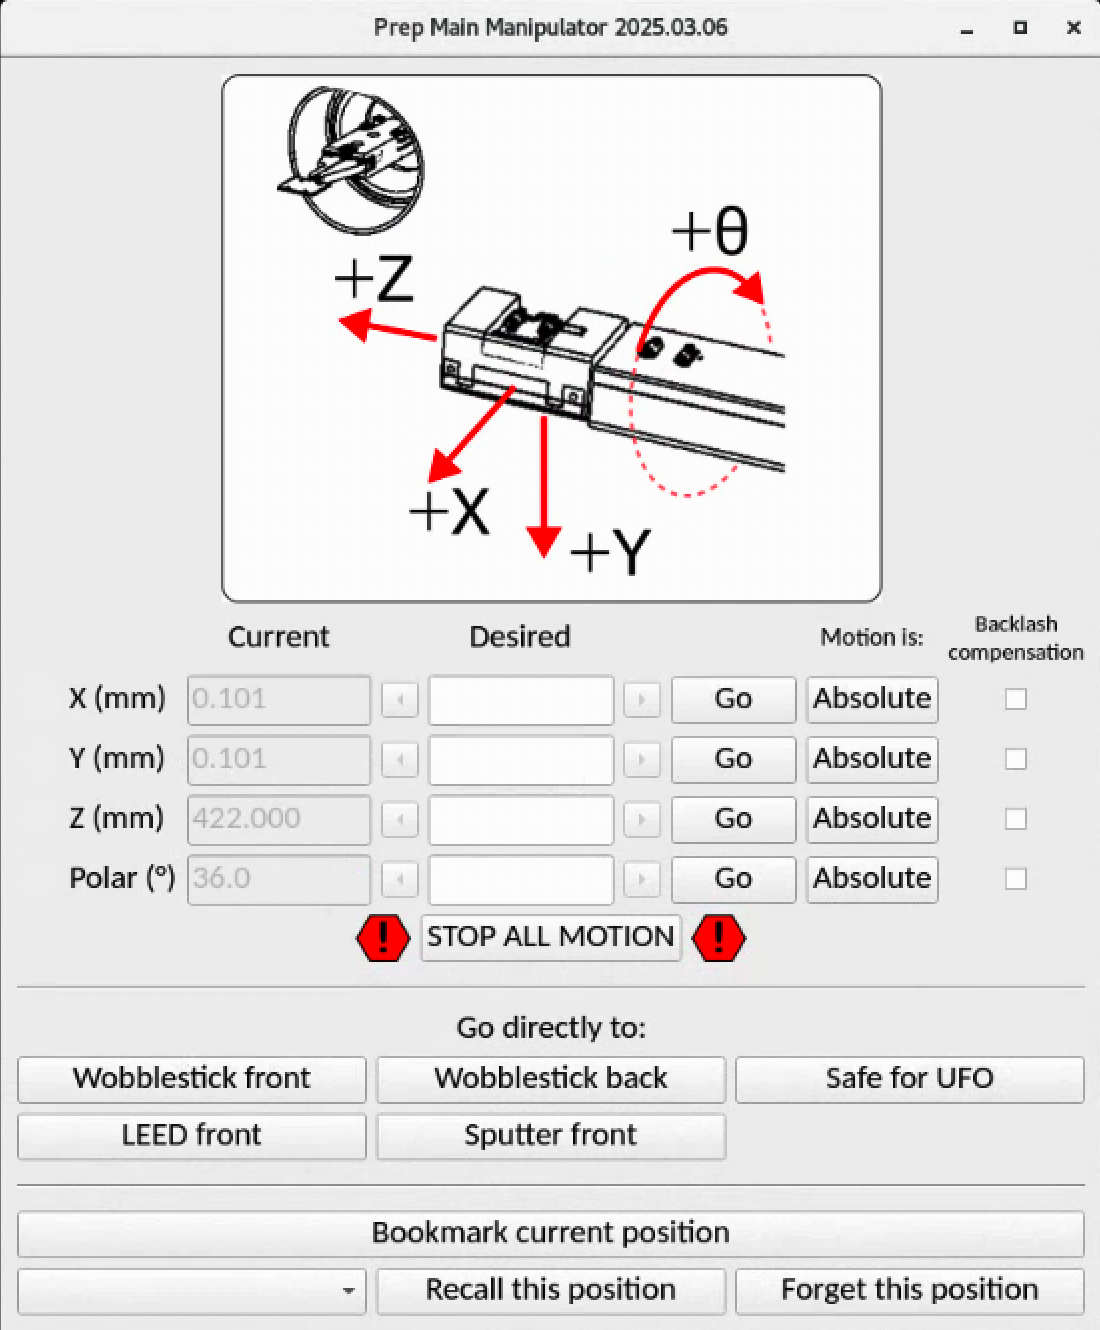
When using this panel, you can also bring up a second ‘Automap’ panel similar to the one used with the Carving, that will keep a record of where the manipulator has been and allow you to program simple x-y raster scans. This can be useful when searching for a LEED pattern, or to raster the sample in front of the sputter beam.
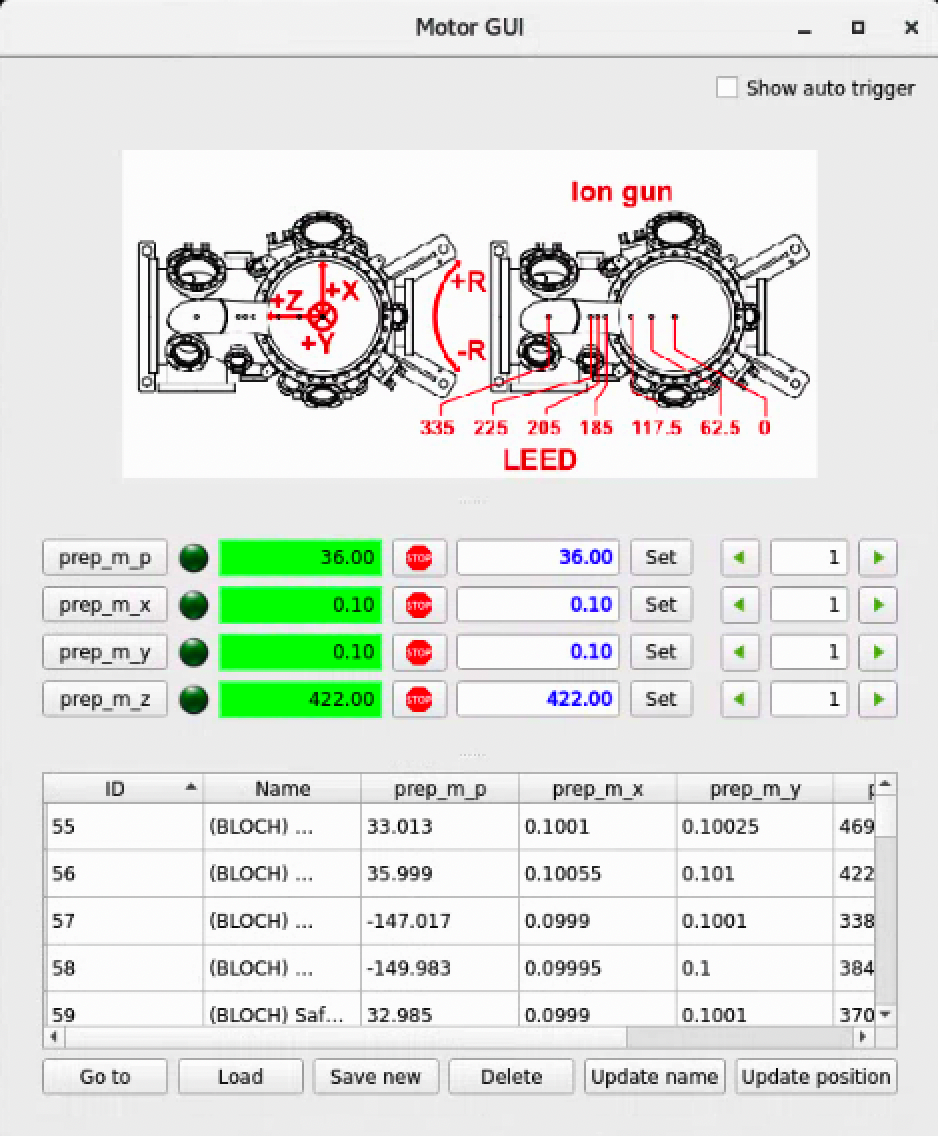
Option 2: ‘Classic’
Run the ‘BlochControlsGUI’ shortcut on the desktop, then choose ‘Manipulator PM’ under ‘ARPES endstation’
When it first opens it is missing the drawing of the axes and the list of saved positions. These are enabled by pulling on almost invisible horizontal lines:
This gives you absolute or relative motion control of all axes. There is also a list of saved coordinates. Positions prefixed by (BLOCH) have been set and checked by us, everything else is to be trusted at your own risk. To go to a position, select it and push the ‘Go to’ button.
Sputtering
(See also the dedicated Sputtering page)
Sputter current can be measured in the heating receiver, with the important caveat that in both cases, what is being measured is the total sputter current impinging on the entire sample plate. It is not necessarily the flux onto your sample.
Connect a suitable ammeter (e.g. Keithley 6485) between the DH2 terminal and the grounded chamber chassis. Manually ground the DH1 terminal. This measurement is only possible when there is no emission current from the ebeam filament underneath.
We have a dedicated test sample for locating the size and position of the sputter beam at normal incidence, so the saved manipulator positions should correctly position your sample in front of the beam.
Remember to ground the DH2 terminal when you remove the ammeter, otherwise the sample can charge while sputtering.
It is possible to heat while sputtering, but you need to turn off or bypass the ion gauge to avoid tripping an interlock on the HEAT3 unit.
Heating
Direct current heating
Cables are available for the direct heating feedthrough that terminate in banana plugs. Also DC power supplies with various output voltage and current capacity.

Electron-beam heating
Two methods of e-beam heating are available in this chamber. The heater built into the manipulator is the easiest to operate, but can only reach temperatures of approximately 1000° C.
A second home-made heating stage can reach 2000° C. This requires training and supervision from beamline staff to operate.
On-manipulator e-beam heater
The e-beam heater design is the same as in PrepSec. The sample is grounded, and a filament behind the sample plate together with the shield surrounding it are raised to high voltage. To provide the high voltage, it is necessary to use the Prevac HEAT3 controller in the rack.

Connections:
DH1 and DH2 pins must be grounded (custom grounding plugs are available)
EB1 and EB2 pins connected to the black Prevac HEAT3 cables, polarity doesn’t matter
Note that the shields around the feedthrough pin are NOT grounded, so don’t try to alligator clip onto them for grounding.
Sample orientation can be a factor since the filament tends to sag - avoid having the sample facing down to the floor if you can.
A thermocouple is mounted on the sample receiver. It will generally under-read due to the loose coupling between the sample and the receiver, so you should rather use a pyrometer to monitor your sample temperature, and never use the automatic PID control option in the HEAT3 controller.
With no high-voltage applied, the heater can be operated as a simple resistive heater. Since this filament is thin and fragile, you must treat it very gently - slow ramps to not more than 3.3A. Heating in this way is not yet calibrated, but we expect sample temperatures of up to 550° C.
With e-beam heating, aim to fix the filament current at the lowest value you can that still reaches the desired temperature, typically 3.0A. Temperature control is then by setting the high voltage, 0-1kV.
Here are some example e-beam parameters as of September 2021, but please note that minor changes to the properties of the filament can dramatically alter the heating behaviour … treat these values as a first estimate only:
Filament current (Ic) |
High voltage (Ue) |
Emission current (Ie) |
Thermocouple temperature(° C) |
Pyrometer temperature (° C) |
|---|---|---|---|---|
3.0A |
300 |
46mA |
545 |
615 |
3.0A |
330 |
62mA |
610 |
720 |
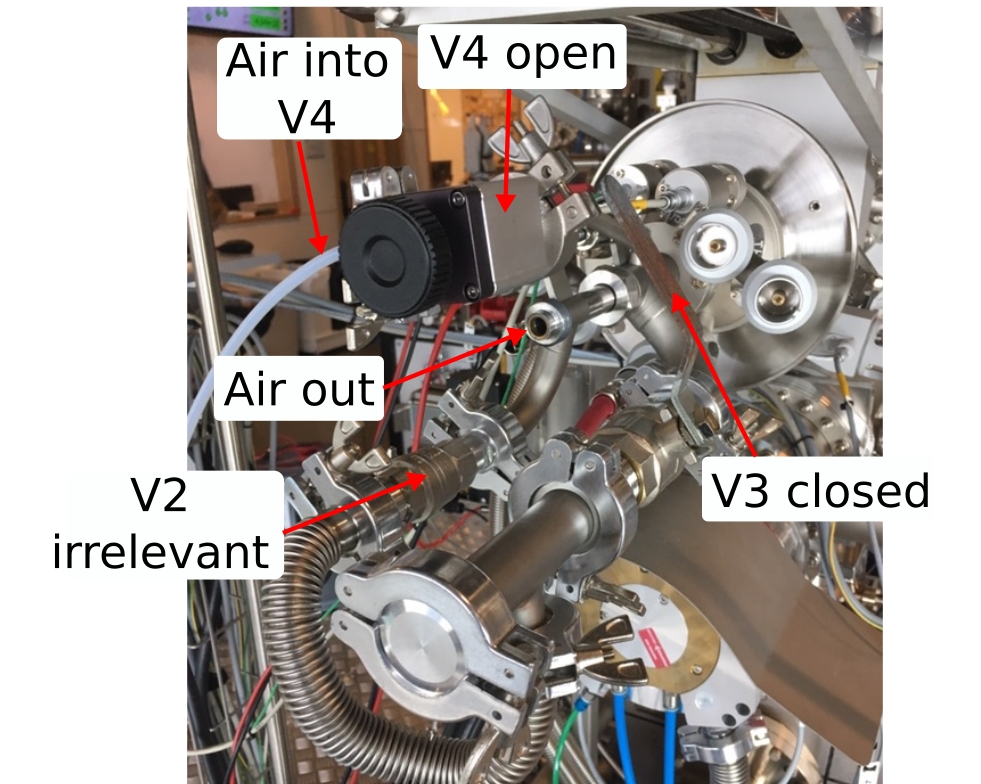
There are silicon diodes on the cooling part of the manipulator which must not exceed 500K (200° C). Their reading is shown on the bottom of the PrepMain HEAT3 controller (‘D1’ and ‘D2’). For this reason, as well as to minimise degassing while heating, it is a good idea to run air cooling when e-beam heating in PrepMain. Pull the compressed air line from the PrepSec chamber, and configure the PrepMain manipulator as shown below:
Cooling
It is possible to cool samples with liquid nitrogen on this manipulator. Contact beamline staff if this is of interest.