Sputtering
Neon (6.0) and argon (6.0) are available for sputtering. Beamline staff are responsible for filling gas lines when needed.
Sputter beam characteristics
It is possible to measure the total sputter current by connecting an electrometer to the electrical contacts of the receiver. Note that this tells you only about what is hitting the entire stage, not whether it’s hitting your sample. See the wiring diagrams on the PrepSec and PrepMain pages to figure out how to connect the electrometer for each sample receiver.
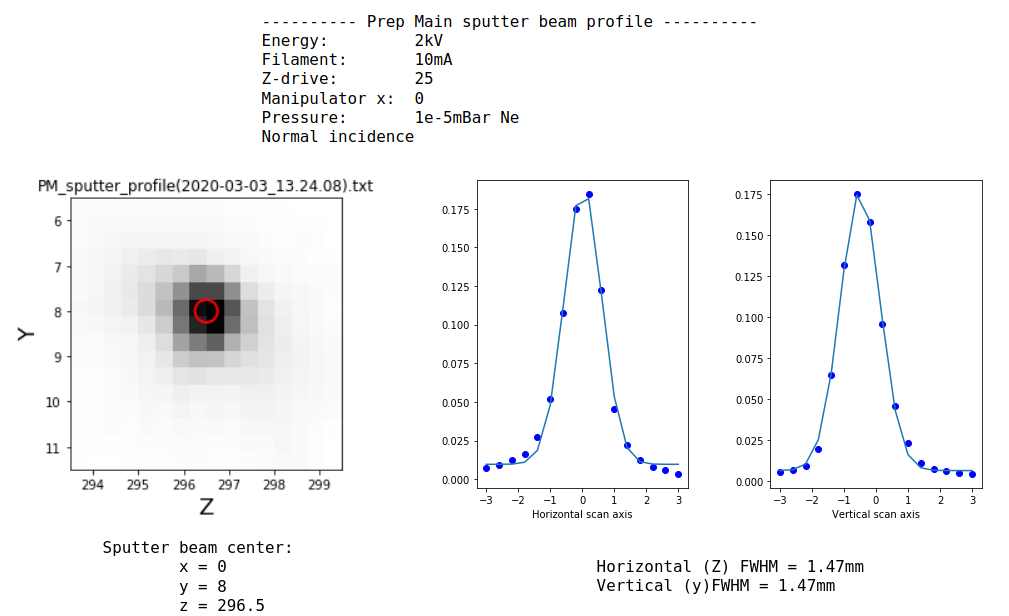
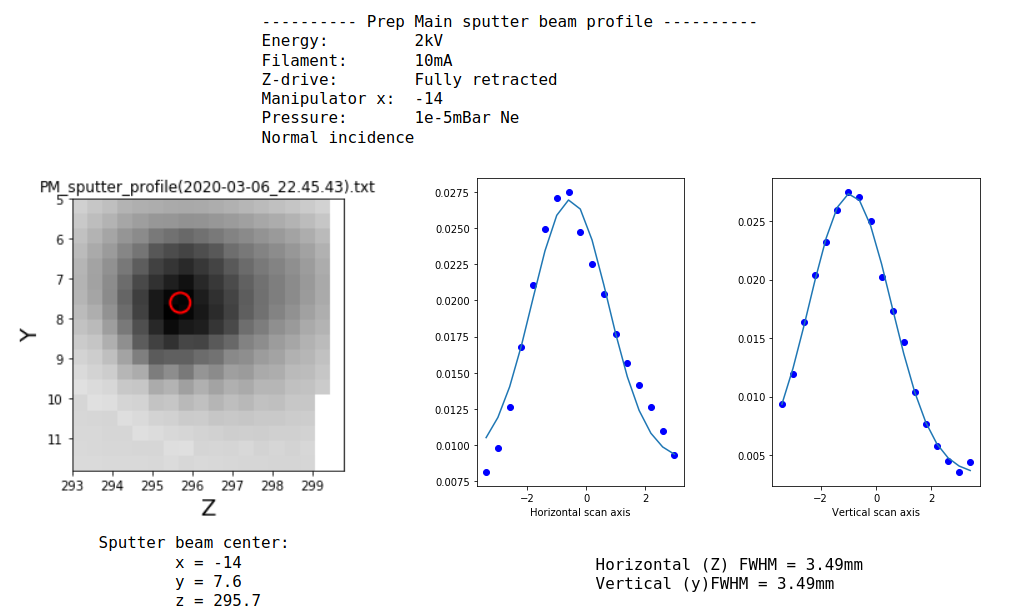
We have a special test sample that can profile the sputter beam at normal incidence. For the gun on the main prep chamber, this tells us the following:
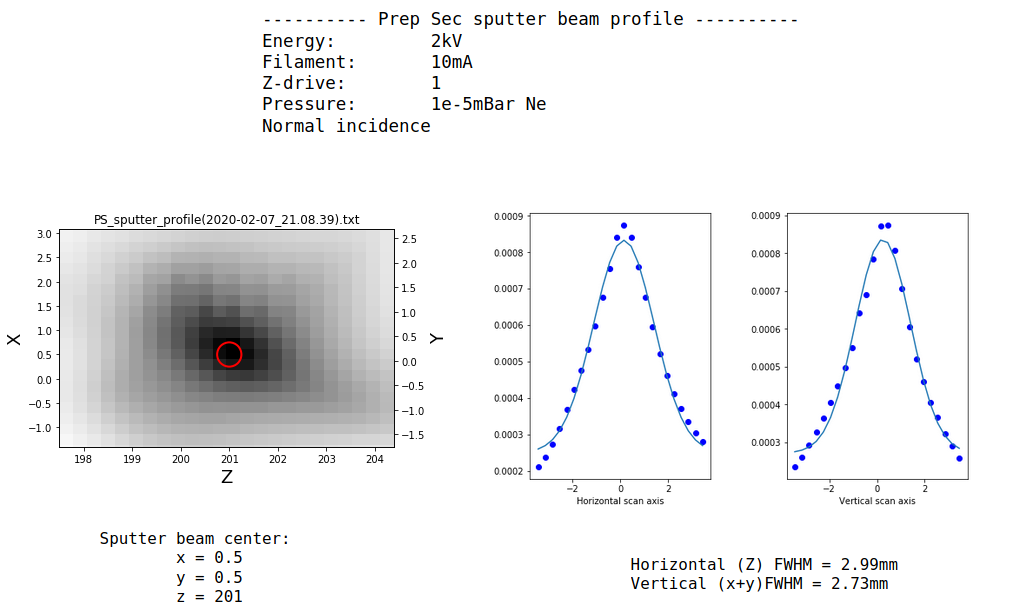
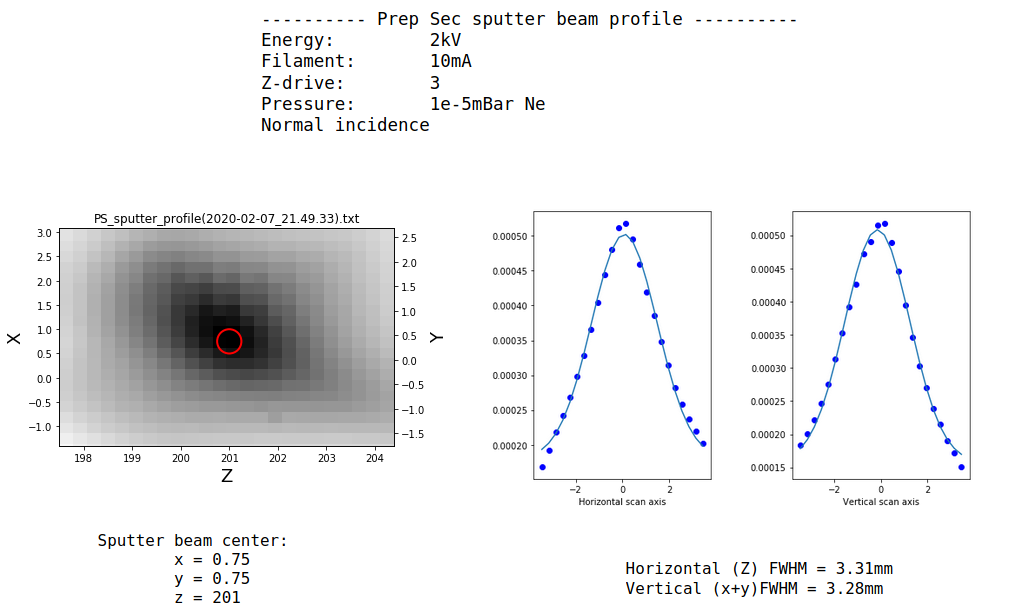
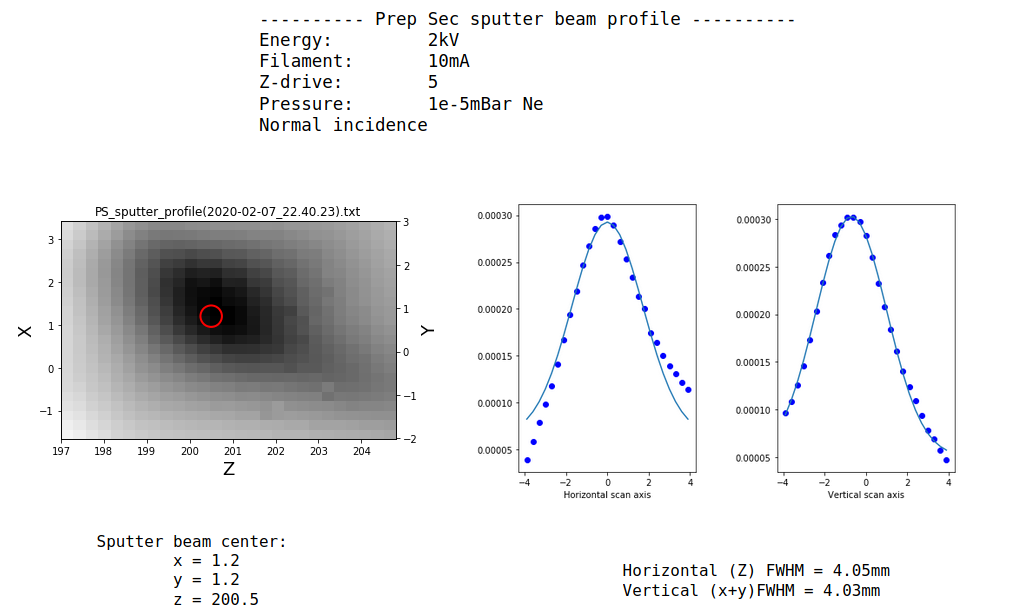
(On prep sec the horizontal plane is a combination of x and y motion. This is accounted for when extracting the horizontal FWHM).
In general the spot size increases as you go to lower energies and as you retract the gun from the sample. The sputter current increases approximately linearly with emission current, beam energy and gas pressure.
It’s possible to raster scan the sample in front of the sputter gun if the spot size is smaller than your sample. A very unpolished python script enables this, which resides on the endstation computer in Desktop/PrepScanner. Talk to Craig if you need help using this.
Sputtering procedure
Turn on the sputter gun controller. There are two IS40-PS units on the small rack next to the endstation computer, one for PrepSec and one for PrepMain. There will be a small pressure burst since the controller always runs a small idle current through the filament
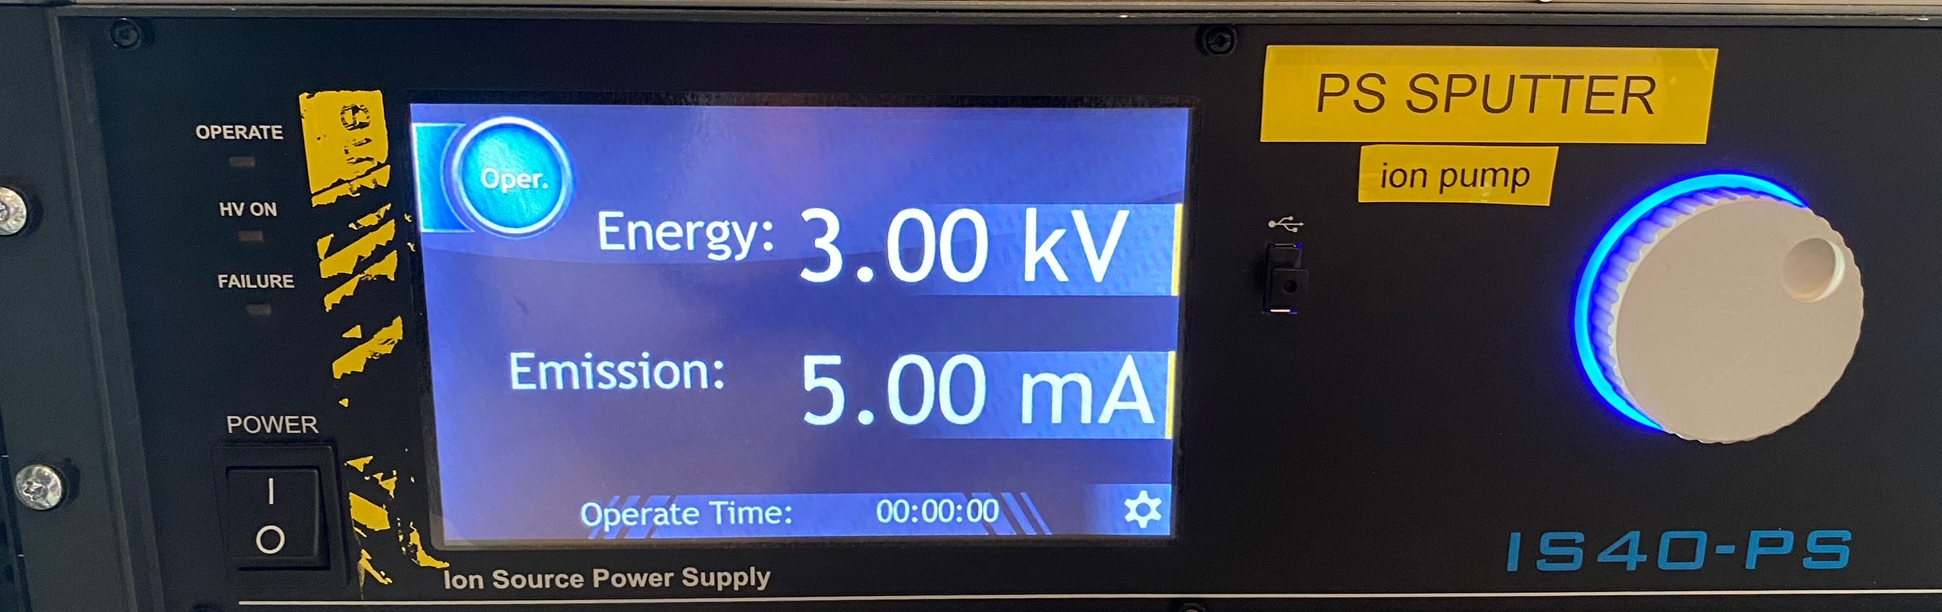
Set the energy and emission parameters by touching the screen to select them, then using the physical scroll wheel to change their value. We typically use 10mA emission current.
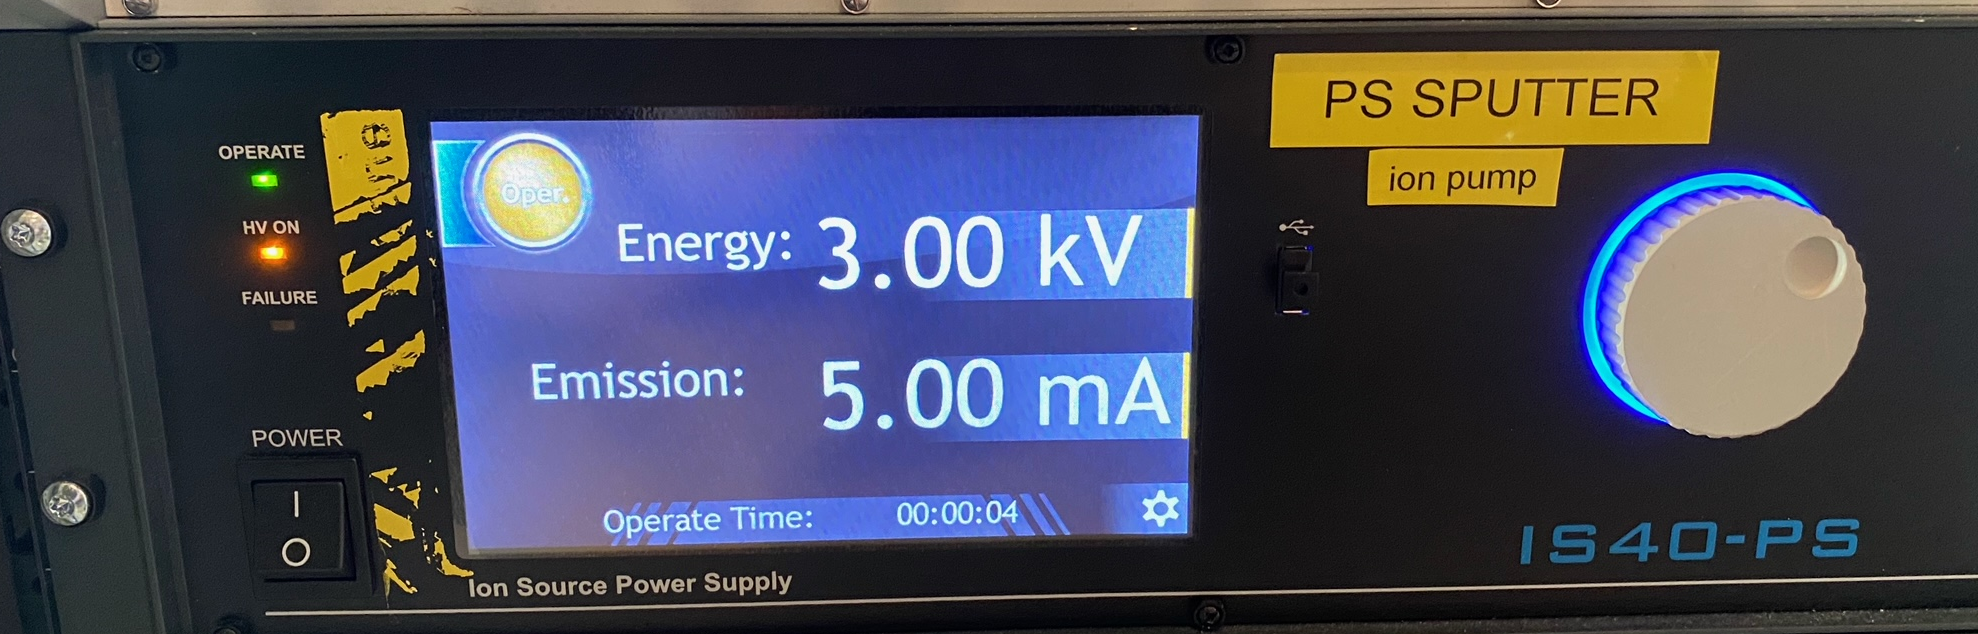
Until you press the round ‘Oper.’ button in the upper left of the touchscreen, these values are not being applied. Press that button now: it will turn orange, the ‘operate’ and ‘hv on’ LEDs will illuminate and a timer will start.
Close the pneumatic gate valve to the ion pump (you can leave the ion pump running)
Check that the valve to the UFO chamber is closed
Bypass the ion gauge reading
SLOWLY open leak valve, watching ion ggauge AND cold cathode reading. The first time you do this, it must be supervised by a beamline staff member.
When you have finished sputtering:
Close leak valve
Turn off sputter HV
Open ion pump gate valve